I was in high school when I attended my first comic con. My best friend (who has been obsessed with comic books since forever) told me about it: the big-name actors who show up, the goodies for sale, the costumes…
Costumes?! I perked right up.
For anyone who has ever wished that every day could be Halloween (me!), cosplay sounded like a dream come true.
I dove into the world of cosplay, researching costuming techniques and scouring screenshots of my favorite characters for costume ideas.
It was all worth it to see the look on my friend’s face when I arrived at her house dressed as Nico from Runaways.
Over the years, I’ve also cosplayed as Zelda, Haley (from the web comic Order of the Stick), Yuffie (from Final Fantasy 7), Beast Boy, Red Arrow, and Squirrel Girl.

I take it as a point of pride that I’ve never bought any of my costumes from a store – but neither have I made them completely from scratch. I like to think I’ve found a balance between purchasing and crafting that’s both satisfying and fun.
Here are my tips for making your own costumes without spending all your money or learning professional-grade sewing skills.
1. Think in parts. Buy what you can
When I’m first planning a new costume, I get as many reference photos as I can. I first look for pieces that look like regular clothing, stuff I could buy pre-made. These pieces save time and effort since I don’t need to sew them from scratch. Plus, they’re often more comfortable to wear all day at a con.
For my Squirrel Girl costume, I looked for a brown cropped bomber jacket, brown boots, pale leggings, and a brown leotard. That’s basically the majority of the costume right there!
For the rest of it, I searched online and found the ears, tail, and belt.

Is it an exact match? No. But it’s close enough. And that leads me to tip #2…
2. Close enough is good enough
Unless you’re a professional cosplayer (in which case, welcome!), you probably won’t have a movie-quality costume. And that’s ok!
When you’re just starting out, and especially if you’re on a budget, the trick to a good cosplay is to replicate the image, the outline, the suggestion of the character’s costume, not to exactly reproduce it.
This is especially true for video game and comic book characters, when artists aren’t held back by pesky details like gravity or realistic fabric. Characters are often drawn in exaggerated or impossible outfits, which is great for comics, but not so great for real-world sewing.
When I cosplayed as Yuffie from Final Fantasy 7, I started with some premade pieces like the shorts and shirt…but then I had to modify them. Heavily.
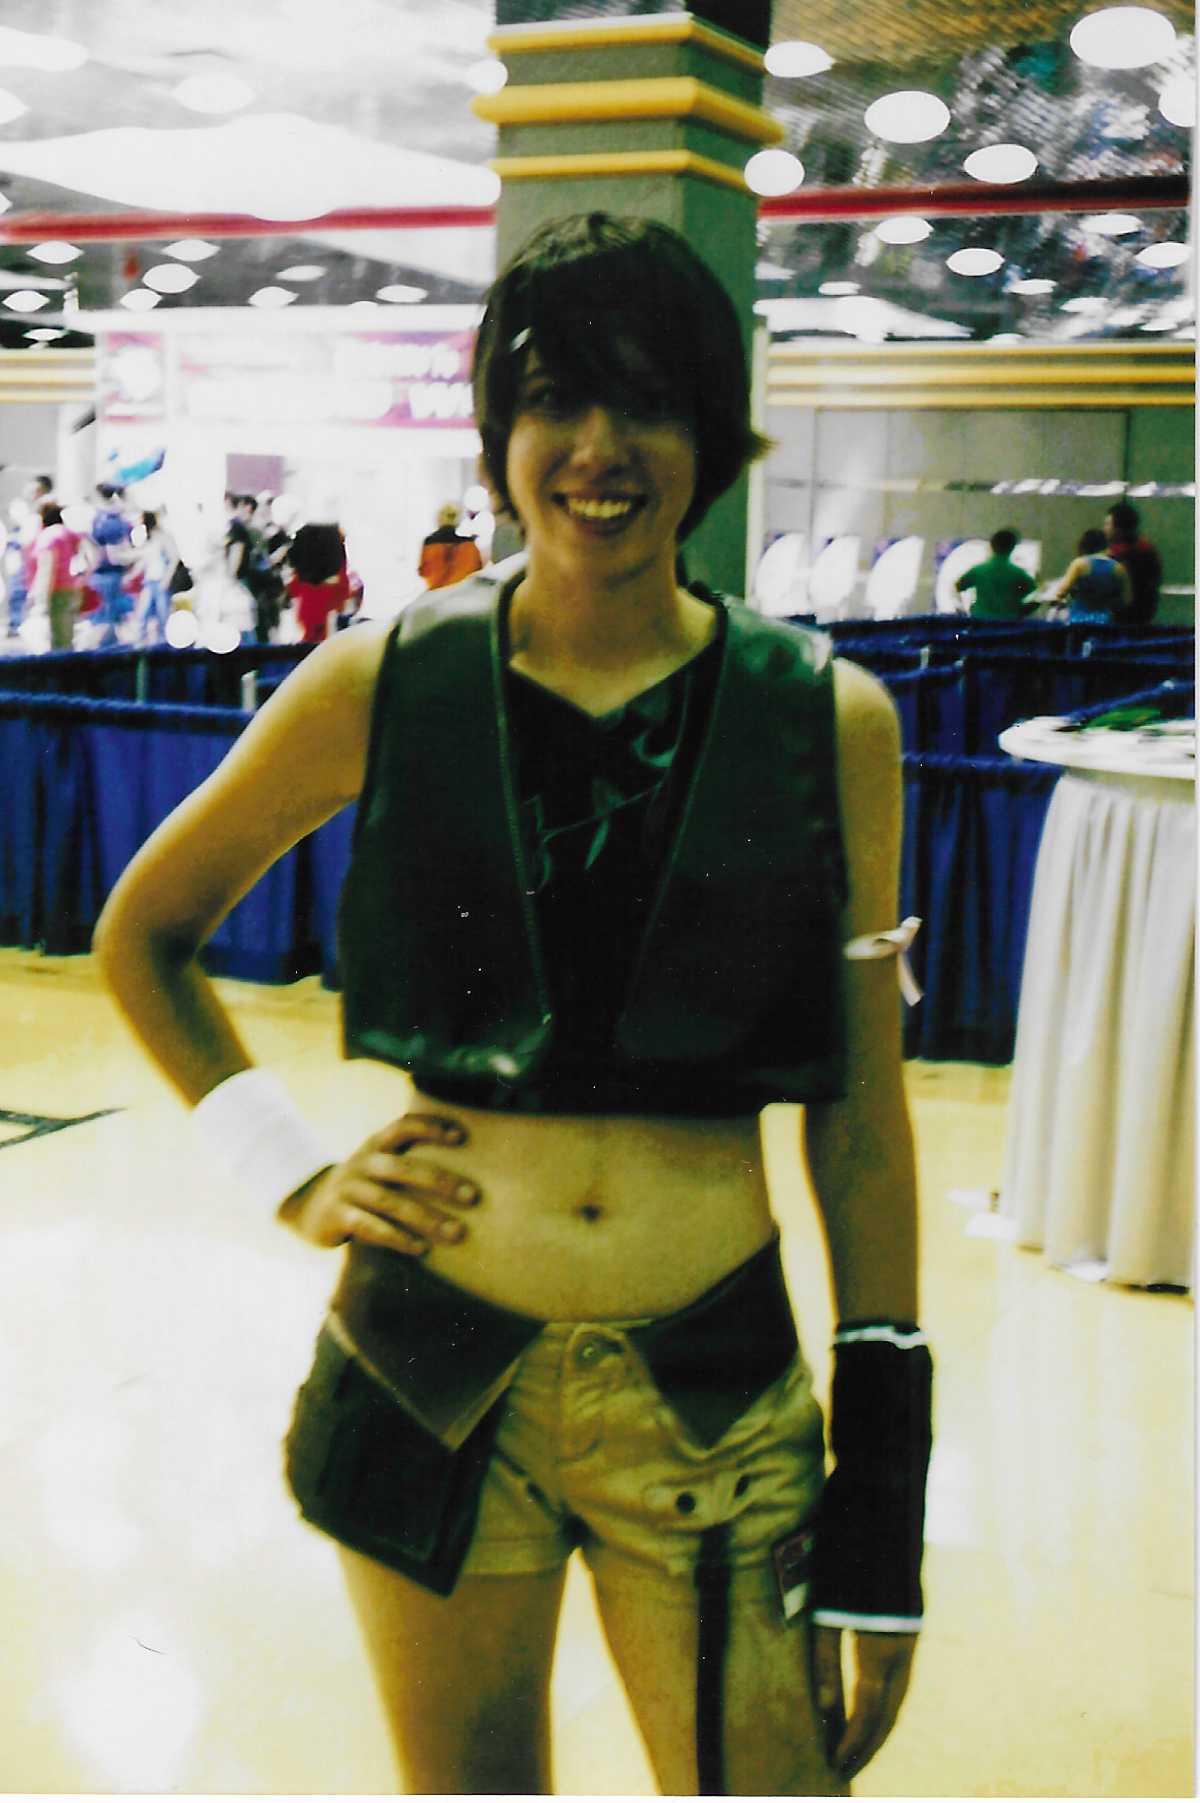
I first bought a pair of khaki shorts that fit me well. (Comfort is high on my list of priorities when going to a con.) I matched the color with a thinner (and easier to work with) fabric to form the decorative waistband at the top of the shorts. I also used a dark brown pleather fabric to get that two-tone look.
I was lucky with the straps – I had a horseback-riding friend who was throwing out an old pair of reins. Turns out they were the perfect width and material for the straps on the shorts – and they already came with a buckle! (This saved me from having to buy one and attach it – more money and time saved!)
My point is that the finished outfit didn’t look exactly like the character in the video game. But it was similar enough to be recognizable…at least to the hundreds of people who took my photo.
3. Modify patterns. Choose the right fabrics
The more you cosplay, the more you’ll recognize which fabrics are the best for each effect. You’ll also start to learn which are easier to work with than others.
For example, fake fur? Gets everywhere. That’s why I decided to buy a tail for Squirrel Girl instead of trying to make one.
When I decided to cosplay as Red Arrow from the show Arrow, the character was still so new that I had few reference photos and fewer ready-made options. I was able to buy the pants and the boots, but the jacket was going to have to be custom made.

I scoured the patterns at my local fabric store. I knew I wasn’t going to find an exact pattern for what I needed, so I looked for a similar base shape. Even though the pattern wasn’t a perfect match, it had the right general structure: long sleeves, a fitted torso, etc. I could work with that.
Again, I looked at the pattern in pieces.
When I found something pretty close, I went looking for fabric. I ended up picking an upholstery fabric that was intended to cover outdoor chair cushions. However, it had the deep red color and shiny quality I was looking for.
This fabric turned out to be really easy to work with…but any holes I made (like for pins, or if I had to rip out stitches) stayed forever, so I had to be careful.
The jacket pattern didn’t originally have a hood. Fortunately, I had an old cloak from a previous Halloween costume, so I measured the collar from the pattern, then traced the cloak hood on a piece of newspaper to make my own pattern. Instead of the original pattern’s collar, I just attached my hood instead.
(Bonus tip: Don’t throw away your old Halloween costumes! You never know what you’ll use them for next.)
Then I used black spray paint on the bottom of the jacket to give it that black gradient look.
To be honest, it wasn’t very comfortable; upholstery fabric isn’t generally used for clothing for a reason. Additionally, the spray paint never fully dried, which meant I couldn’t store it or even wear it again.
Still, for a one-time costume, I was pretty pleased with the result. And I was the only Red Arrow at the con that year!
4. Miscellaneous Tips
There are a few other random tips I’ve collected over the years. Hopefully these make your costume creation go a little smoother!
First, make sure you use the right tools for the job. It’s important to consider the materials you’re using, especially when attaching pieces of the costume or props. Sometimes a sewing machine is best, but other times hot glue or E6000 (my personal favorite) is better.
(The website Glue This to That is my favorite for all things glue.)
Also, plan ahead to shop Halloween sales. If you can buy wigs, skirts, boots, or a shirt on sale, so much the better! Dance and theater stores or websites are also extremely helpful, especially since most comic costumes are skin-tight, yet still require movement.
I used a lot of dance and theater companies when I was planning my Beast Boy costume.
For the base, I actually used a dancewear unitard. (A unitard is like a leotard, but with long sleeves and long pants attached.)

I used purple dye to color the shorts and a turtleneck shirt, then I sliced the sleeves off the turtleneck. I colored the shoes with fabric markers and added the high tops with purple cotton fabric over batting.
I dyed a blond wig green and used theater-grade cake makeup on my face. I darkened my eyebrows with mascara. Another tip: Spirit gum is your friend for attaching superhero masks or pointy ears.
5. Make it your own
After seeing how much fun I had cosplaying, my friend was intrigued, and she started cosplaying too.
When I make a costume, I try to keep my budget as low as possible. I like the challenge of making something very close to the original concept without breaking the bank.
My friend, on the other hand, has more time, money, and patience than I do. As a result, her costumes turn out like this:

But that’s the point! It doesn’t matter if your costumes are movie-quality or bargain basement looks. I believe cosplay is about creativity and expression, not perfection. If your skills are up to the task of perfect replication, go for it! But if not, don’t sweat it.
Besides, con-goers are some of the most welcoming and accepting people I’ve ever met. If you show up in a costume, someone will take your picture. Guaranteed.

Written by Tori Studer
Tori Studer is a teacher and freelance writer. She has an unnatural love of grammar, Dungeons and Dragons, and learning anything new, and she believes a great pun is its own reword. When she’s not writing, she can be found haunting local bookstores or taking random online classes.
What about you? Have any cosplay tips or tricks? What costume do you want to attempt – but haven’t yet? Share in the comments!